Disclaimer: The following methods are based on my personal cleaning routine. While these natural ingredients are generally safe, always test a small, inconspicuous area first, especially on delicate surfaces like marble or finished wood.
I used to spend a small fortune every month on specialized chemical cleaners—one for the oven, one for the sink, and another for the floor. Not only was it expensive, but the harsh chemical smell often gave me headaches.
Last month, I decided to go back to basics. I challenged myself to clean my entire kitchen using just two pantry staples: White Vinegar and Baking Soda. The results didn’t just surprise me; they convinced me to never go back to store-bought chemicals again. Here is exactly how I did it.
1. Reviving My Burnt Pots and Pans
We’ve all been there—leaving a pot on the stove for a minute too long. I had a stainless steel pan with a stubborn burnt bottom that I thought was ruined.
My Method: I poured a cup of water and a cup of vinegar into the pan, brought it to a boil, then removed it from the heat and added 2 tablespoons of baking soda.
The Result: After letting it fizz and sit for 15 minutes, the burnt bits literally slid off with a light scrub. It looked brand new without any heavy scrubbing on my part!
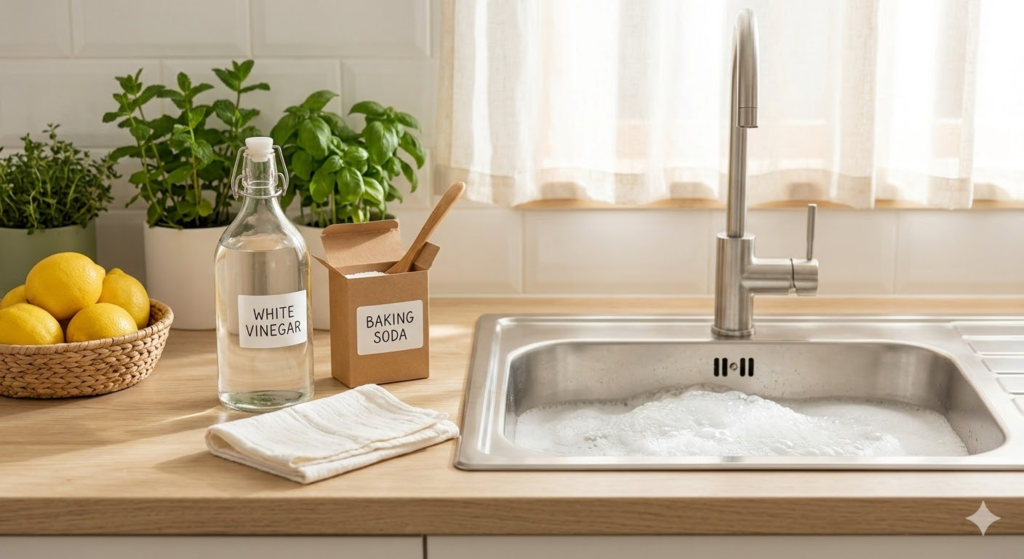
2. Deep Cleaning the “Smelly” Kitchen Sink
Even with a garbage disposal, my sink started to develop a lingering odor that bothered me every time I walked into the kitchen.
My Routine: I poured half a cup of baking soda down the drain, followed by a cup of white vinegar.
The Experience: Watching the “volcano effect” fizzing up is surprisingly satisfying. I let it sit for 10 minutes then flushed it with boiling water. The smell was completely neutralized, not just masked by artificial scents.
3. Making My Glass Stove Top Shine Again
Grease splatters are the enemy of a glass stove. I used to use a razor blade to scrape off the grime, which always made me nervous about scratching the surface.
My Secret: I sprinkled a generous layer of baking soda over the cool stove top, sprayed it with a mist of white vinegar, and covered it with a warm, damp towel for 15 minutes.
The Result: The steam and the chemical reaction softened the grease so much that I could simply wipe it away with a microfiber cloth.
4. Refreshing the Refrigerator Without Chemicals
I’ve always been wary of using bleach near where I store my food.
My Adjustment: I mixed a solution of 50% water and 50% vinegar in a spray bottle.
The Benefit: It cut through the sticky spills on the shelves effortlessly. For the lingering “fridge smell,” I simply left an open box of baking soda in the back corner. It’s been three weeks, and my fridge still smells neutral and clean.
Why I’m Sticking to This Routine
Switching to these natural “smart” cleaning hacks has done three things for my home:
Saved Money: A giant bag of baking soda and a gallon of vinegar cost less than one bottle of premium degreaser.
Better Air Quality: No more toxic fumes or “fake lemon” smells.
Simplicity: I no longer have a cluttered cabinet full of plastic bottles.
Final Tips for Your Natural Cleaning Journey
If you’re ready to try this, my best advice is to be patient. Natural cleaners often need 10–15 minutes of “sitting time” to work their magic since they don’t use harsh acids to melt grime instantly. But the wait is well worth the health and cost benefits.
What is your favorite “old-school” cleaning hack? Let me know in the comments below!
References:
Personal home maintenance logs (2025-2026).
General safety guidelines for household acidic and alkaline reactions.